My Garage
Cart
Make sure this part fits

Hyundai 24200-2B665 Camshaft Assembly-Exhaust

2011-2017 Hyundai 242002B665

Customer Questions & Expert Answers (3)
24200-2B665 Hyundai Camshaft Assembly-Exhaust Product Photo 1 of 3
  • Part Description
    Camshaft Assembly-Exhaust
  • Part Code
    24200A
  • Manufacturer
    Hyundai
Make sure this part fits
$124.25 MSRP: $174.56
You Save: $50.31 (29%)
Ships in 1-3 Business Days
1
ADD TO CART
  • Related Parts
  • Product Specifications
  • Vehicle Fitment
  • Customer Questions & Expert Answers
  • Product Specifications

    BrandGenuine Hyundai
    Part Code24200A
    Manufacturer Part Number24200-2B665
    Part DescriptionCamshaft Assembly-Exhaust
    Other NamesCamshaft
    Item Weight5.50 Pounds
    ConditionNew
    Fitment TypeDirect Replacement
    ManufacturerHyundai
    SKU24200-2B665
    WarrantyThis genuine Hyundai part is guaranteed by Hyundai's factory warranty.
    Shipping & ReturnShipping Policy Return Policy
    Warning: California's Proposition 65
  • Vehicle Fitment

    Year Make Model Trim & Engine Important vehicle option details
    2011-2017 Hyundai AccentDOHC - GDISedan - 4Door 5P, Sedan - 5Door 5P
    2011-2014 Hyundai VelosterDOHC - GDICoupe - 4Door 4P (DR'S 1Door & Pass 2Door)
  • Customer Questions & Expert Answers

    Q:
    Before I order I would like to verify if this part will fit my vehicle Posted by HyundaiPartsDeal Specialist
    A:
    You can Select Your Vehicle to check if 24200-2B665 fits your vehicle.
    Posted by HyundaiPartsDeal Specialist
    Q:
    How to remove and install Camshaft on 2011 and earlier Hyundai Accent? Posted by Customer
    A:
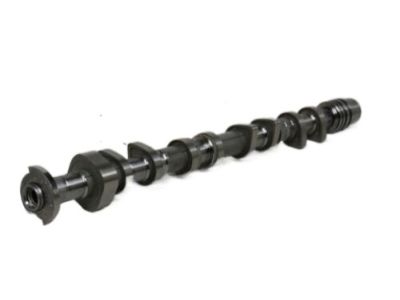
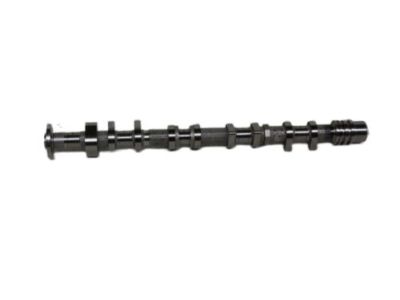
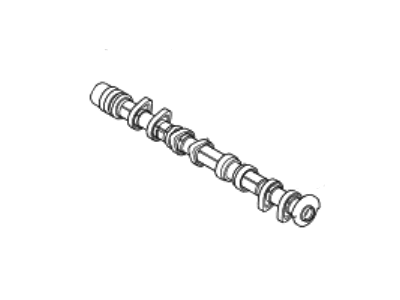
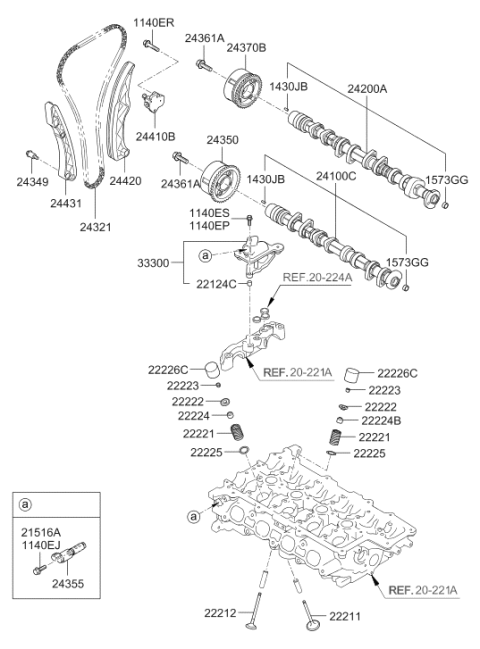
    For SOHC models, begin by disconnecting the negative battery cable and draining the cooling system before removing the upper radiator hose from the thermostat housing. Next, take off the valve cover and remove the rocker arm assemblies. For 1994 and earlier models, the distributor should be removed, while for 1995 and later models, the ignition coil assembly is to be taken out. If applicable, remove the fuel pump. Proceed to take off the timing belt and camshaft sprocket. For 1994 and earlier models, remove the retaining screws and rear cover from the cylinder head, ensuring to remove the lower bolts first, followed by the upper bolts, and finally the thrust case retaining bolt. Slide the camshaft and thrust case out, taking care not to damage the camshaft journal bores. For 1995 and later models, remove the camshaft bearing caps, noting their positions for reinstallation, and lift out the camshaft(s). Clean all components thoroughly and inspect the camshaft bearing surfaces and lobes for wear. Measure the camshaft lobe heights and journal diameters, replacing the camshaft if measurements are out of limits. Inspect rocker arms and hydraulic lash adjusters, and measure the endplay clearance for both model types, replacing components as necessary. For installation, lubricate the camshaft bearings, position the camshaft(s) in the cylinder head, and install the bearing caps, ensuring all mating surfaces are clean and dry. Install a new camshaft oil seal, rotate the camshaft to the correct position, and install the timing belt and sprocket. Reinstall the distributor if equipped, followed by the rocker arm assemblies, and check valve clearances before securing the valve cover. Refill the cooling system and reconnect the battery cable, warming the engine to check valve clearances again. For DOHC models, inspect the camshaft and lifters before installation, checking for wear and ensuring the hydraulic lifters are functioning properly. Remove the valve cover, timing belt cover, timing belt, and camshaft timing belt sprocket, then loosen the camshaft bearing caps in a criss-cross pattern and remove them along with the camshafts and timing chain. Clean and inspect the timing chain and sprockets, ensuring all components are in good condition. Measure camshaft lobe heights and bearing surfaces, checking for wear limits. Install the lifters into their respective bores, lubricate the camshaft and bearing journals, and align the timing marks on the camshaft sprockets according to the model year. Finally, lower the camshafts and timing chain into position, install the bearing caps, and tighten them evenly before installing the timing belt and completing the installation in reverse order.
    Posted by HyundaiPartsDeal Specialist
    Q:
    How to remove and install Camshaft on 2012 and later Hyundai Accent? Posted by Customer
    A:
    Camshafts must be inspected orally before fitting and the camshaft end-float should be measured before dismantling. It is advisable to start with the removal of the battery by firstly disconnecting the battery cables. Place the engine at the top dead center for the number 1 cylinder, then unbolt and pull off the air cleaner assembly, and the high-pressure fuel pump as well. Next, take off the exhaust OCV mounting bolt, pull the OCV out from the vale cover and, finally, take off the valve cover off. Undo the Exhaust OCV adapter plate screws and pull out the adapter from the head of the cylinder. Some of the tasks include; Pulling off the drive belt, alternator, as well as the water pump. Once the TDC marks are lined up on the two sprockets hold the camshaft with a large wrench and then ease the camshaft phaser sprocket bolts out without fully removing them. Take out the bolt on the side of the engine Blanc There is exposed to the service hole in the timing chain cover If necessary use a clean scraper to clean the Loctite sealer off the threads. Insert a small screwdriver and loosen the tensioner ratchet; pull the chain off the sprocket, and take out the bearing cap and the upper bearing. The rest of the other camshaft cap bolts are to be loosened and the camshafts are to be removed but ensure the caps are arranged to ensure that they are placed back as they where. Take out the lifters to be back, and also to make sure they are arranged correctly and examine all the related parts for any signs of wearing. Measure camshaft endplay with dial indicator, look for bearing wear, measure the camshaft bearing journals, and measure the lobe heights. Check for the camshaft runout and check the lifters for scuffing appearance. During assembly, the lifters need to be cleaned with the engine oil, then the exhaust camshaft lower bearing followed by applying the lubricant to the camshaft lobes and journals before putting the camshaft into an appropriate cylinder head. Next, fit in the upper bearing and the bearing caps should be tightened in the proper manner. Position the timing chain to cover the camshaft sprockets, lock the camshaft in order to prevent it from rotating and then tighten the phaser sprocket bolts to their specified torque. Raise the tensioner link and fit in a new service hole bolt now. For adjustment, right, unscrew the Valve cover, and align number one cylinder to TDC, and also using a feeler gauge, check the clearance that exists between the camshaft lobes and lifters. Perform the same for the other valves simply by rotating the engine and graduating on to the next step. If clearances are beyond the set limits, it is advisable to further detaching the camshaft(s), and measuring the thickness of the lifter(s) to find out the right thickness of the new lifter(s). Once the new lifters and camshafts have been installed clearances should be checked, application of installation lubricant, and then once the components are in their proper position the bearing cap bolts should be tightened to the recommend torque.
    Posted by HyundaiPartsDeal Specialist
    If you have any questions about this product, please don't hesitate to ask us. We will be happy to help you!

Genuine Hyundai Part 24200-2B665, your Right Choice

Select the OEM Part #24200-2B665 Camshaft Assembly-Exhaust. It can be referred to as Camshaft. This part is compatible with 2011-2017 Accent, 2011-2014 Veloster. Premium OEM quality parts improve performance and extend the life of your vehicle. They undergo strict quality checks and are built to Hyundai's factory specifications for proper installation.

HyundaiPartsDeal.com is a top provider of genuine Hyundai components and accessories. Looking for budget-friendly Hyundai OEM parts? Your search ends here with our wide range of genuine Hyundai products. Our economically priced parts come with the manufacturer's warranty to make sure you get your money's worth. Experience a smooth shopping journey with our fast delivery and easy return policy.

Why choose Hyundai Parts Deal

  • Dedicated Service

    Your complete satisfaction is our #1 goal

  • Lowest Prices

    Best deals on genuine OE parts from dealerships

  • Fast Delivery

    Orders are processed and delivered promptly