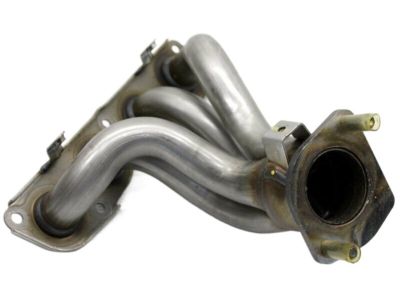
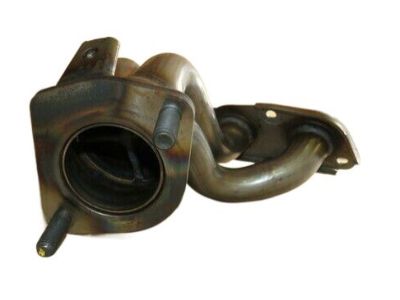
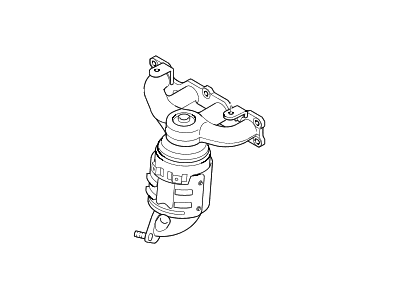
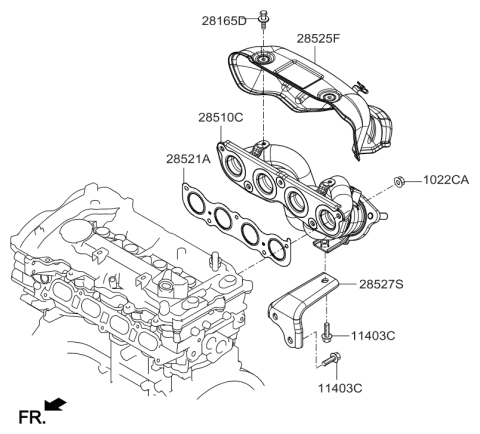
On 1.4L models, the exhaust manifold is integrated into the cylinder head, with the turbocharger bolting directly to it, while on 1.6L models, the exhaust manifold is integral with the turbocharger and must be removed as an assembly. For 2001 and later models, begin by unplugging the electrical connector for the upstream and downstream Heated Oxygen Sensors (HO2S). Next, remove the exhaust manifold heat shield bolts and then detach the heat shield, inspecting the bolts for damage and corrosion, replacing any that are rusted or damaged. Raise the front of the vehicle securely on jackstands, then apply penetrating oil to the exhaust manifold-to-exhaust pipe flange studs and nuts, allowing time for the penetrant to work before removing the flange nuts and disconnecting the exhaust pipe. Note that on some 2014 through 2016 2.0L models and all 2017 and later 2.0L models, the catalytic converter is integrated into the exhaust manifold, requiring the removal of several support brackets before the manifold can be taken off. From above, apply penetrating oil to the exhaust manifold mounting nuts and studs, wait for the penetrant to loosen the fasteners, then remove the nuts and the exhaust manifold itself, discarding the old retaining nuts and gasket. Use a scraper to clean all traces of old gasket material and carbon deposits from the mating surfaces, checking the manifold for warpage if the gasket was leaking. Position a new gasket over the cylinder head studs, install the exhaust manifold, and thread new mounting nuts into place, using high-temperature anti-seize compound on the threads. Tighten the nuts from the center out, then reattach the exhaust pipe with new nuts, again using high-temperature anti-seize compound. Install the heat shield, coat the bolts with anti-seize compound, and tighten them. Finally, plug in the electrical connector for the upstream HO2S and run the engine to check for exhaust leaks.


")
