×
- Hello
- Login or Register
- Quick Links
- Live Chat
- Track Order
- Parts Availability
- RMA
- Help Center
- Contact Us
- Shop for
- Hyundai Parts
- Hyundai Accessories


My Garage
My Account
Cart
Additional information needed to check if this part fits
2020 Hyundai Kona Electric Wagon - 5Door 5P; Motor - 150KW; Electric; Electric; Decelerator
Check another vehicle- Fit Note: BATTERY CAPACITY HV TYPE - BATTERY HV EXTEND, CAR, CONVENTIONAL, BATTERY CAPACITY HV TYPE - BATTERY HV EXTEND, CAR/PED, W/ S&G (WITH STOP AND GO)
- Production Date: 08/2018-04/2021
Hyundai 58520-K4000 Unit Assembly- Integrated Electric
2019-2021 Hyundai Kona Electric 58520K4000
Customer Questions & Expert Answers (1)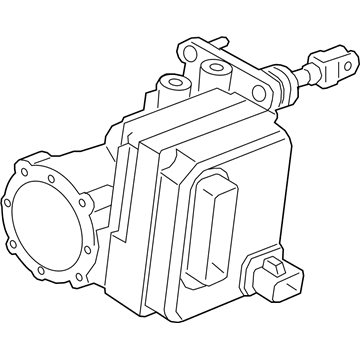
- Part DescriptionUnit Assembly- Integrated Electric
- Part Code58520A
- ManufacturerHyundai
Additional information needed to check if this part fits
2020 Hyundai Kona Electric Wagon - 5Door 5P; Motor - 150KW; Electric; Electric; Decelerator
Check another vehicle- Fit Note: BATTERY CAPACITY HV TYPE - BATTERY HV EXTEND, CAR, CONVENTIONAL, BATTERY CAPACITY HV TYPE - BATTERY HV EXTEND, CAR/PED, W/ S&G (WITH STOP AND GO)
- Production Date: 08/2018-04/2021
$1718.86 MSRP: $2457.76
You Save: $738.90 (31%)
Ships in 1-3 Business Days
1
- Related Parts
- Specifications
- Q&A
Product Specifications
Brand Genuine Hyundai Part Code 58520A Manufacturer Part Number 58520-K4000 Part Description Unit Assembly- Integrated Electric Other Names Brake Assembly, Master Cylinder Condition New Fitment Type Direct Replacement Manufacturer Hyundai SKU 58520-K4000 Warranty This genuine Hyundai part is guaranteed by Hyundai's factory warranty. Shipping & Return Shipping Policy Return Policy Warning: California's Proposition 65Customer Questions & Expert Answers
- Installation & Repair Tips by AI Expert
- Removal 1. Park on a level surface, chock wheels, place transmission in park, and wear gloves and eye protection. 2. Disconnect the 12V battery negative terminal to disable vehicle electronics. 3. Because this is a high-voltage electric vehicle, follow the manufacturer's high-voltage isolation procedure or have a qualified technician perform it and wait the required time for capacitors to discharge. 4. Protect painted surfaces and place a suitable fluid catch container and absorbent rags under the master cylinder area. 5. Clean the reservoir exterior to prevent dirt entering the system when opened. 6. Remove the reservoir cap and diaphragm, then remove as much brake fluid from the reservoir as practical using a hand pump or syringe into an approved container. 7. Identify and note hose/line routing and connection types (clamps, quick-connects, etc.), since designs vary. 8. Loosen and disconnect hoses or fittings from the reservoir, catching any remaining fluid and sealing open lines to minimize contamination. 9. Remove any retaining clips or fasteners securing the reservoir-if the reservoir is integral with the master cylinder, stop and consult the vehicle service information before proceeding. 10. Lift the reservoir free of its mounting, avoiding spills, and inspect mating surfaces, seals, and hoses for damage. Installation 1. Confirm the replacement reservoir is correct and clean inside; install any new seals or O-rings supplied with the part. 2. Position the reservoir onto the master cylinder or mount without forcing and secure with the original clips or fasteners per the vehicle's design. 3. Reconnect hoses and fittings, using new clamps or quick-connects if required, and ensure proper seating to prevent leaks. 4. Reinstall the reservoir cap and diaphragm and ensure vent paths are clear. 5. Refill the reservoir with the manufacturer-specified brake fluid only; do not mix fluid types. 6. Bleed the brake hydraulic system using an appropriate method for the vehicle; if ABS/ESP is present, follow the correct bleeding procedure which may require a scan tool or special steps. 7. Inspect all connections for leaks, correct any issues, and top off fluid to the proper level. 8. Reconnect the 12V battery negative terminal. 9. Re-enable the high-voltage system following the manufacturer's procedure or have a qualified technician complete this step. 10. Check brake pedal feel and warning lights, then perform a low-speed functional test in a safe area; recheck for leaks and fluid level. Repair tips 1. Use only fresh, unopened brake fluid of the type specified by the manufacturer and keep the reservoir and tools clean to avoid contamination. 2. Immediately clean any spilled brake fluid from painted surfaces to prevent damage.
Why choose Hyundai Parts Deal
- Dedicated Service
Your complete satisfaction is our #1 goal
- Lowest Prices
Best deals on genuine OE parts from dealerships
- Fast Delivery
Orders are processed and delivered promptly