×
- Hello
- Login or Register
- Quick Links
- Live Chat
- Track Order
- Parts Availability
- RMA
- Help Center
- Contact Us
- Shop for
- Hyundai Parts
- Hyundai Accessories


My Garage
My Account
Cart
Genuine 2008 Hyundai Santa Fe Cylinder Head
Head- Select Vehicle by Model
- Select Vehicle by VIN
Select Vehicle by Model
orMake
Model
Year
Select Vehicle by VIN
For the most accurate results, select vehicle by your VIN (Vehicle Identification Number).
8 Cylinder Heads found
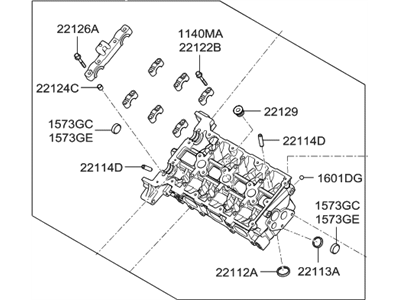

2008 Hyundai Santa Fe Head Sub Assembly Cylinder Left Hand
Part Number: 521R5-3CA00$1007.98 MSRP: $1441.29You Save: $433.31 (31%)Ships in 1-3 Business DaysProduct Specifications- Other Name: Head Sub Assembly-Cylinder, LH; Cylinder Head
- Position: Driver Side
- Replaces: 510G5-3CU00
- Part Code: 22110L
- Item Weight: 37.40 Pounds
- Condition: New
- Fitment Type: Direct Replacement
- SKU: 521R5-3CA00
- Warranty: This genuine part is guaranteed by Hyundai's factory warranty.
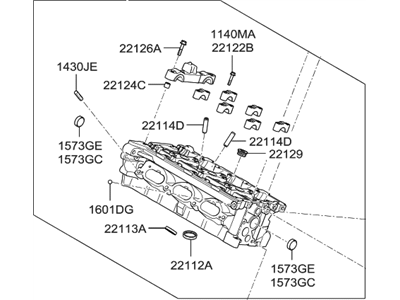
2008 Hyundai Santa Fe Cylinder Head Sub Assembly Right Hand
Part Number: 531R5-3CA00$1007.98 MSRP: $1441.29You Save: $433.31 (31%)Ships in 1-3 Business DaysProduct Specifications- Other Name: Head Sub Assembly-Cylinder, RH; Cylinder Head
- Position: Passenger Side
- Replaces: 22100-3C200, 22110-3C210, 22110-3C200, 511G5-3CU00
- Part Code: 22110R
- Item Weight: 35.70 Pounds
- Condition: New
- Fitment Type: Direct Replacement
- SKU: 531R5-3CA00
- Warranty: This genuine part is guaranteed by Hyundai's factory warranty.
2008 Hyundai Santa Fe Cylinder Head Sub Assembly Right Hand
Part Number: 22110-3C200$1007.98 MSRP: $1441.29You Save: $433.31 (31%)Ships in 1-3 Business DaysProduct Specifications- Other Name: Head Sub Assembly-Cylinder, RH
- Position: Passenger Side
- Replaced by: 531R5-3CA00
- Part Code: 22110R
- Item Weight: 34.00 Pounds
- Condition: New
- Fitment Type: Direct Replacement
- SKU: 22110-3C200
- Warranty: This genuine part is guaranteed by Hyundai's factory warranty.
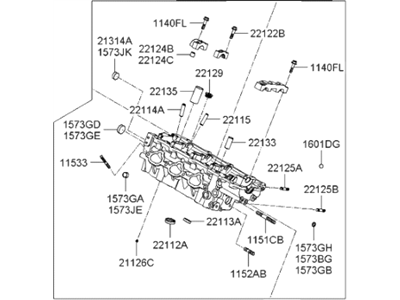

2008 Hyundai Santa Fe Head Assembly-Cylinder,RH
Part Number: 22100-3E052$842.27 MSRP: $1204.34You Save: $362.07 (31%)Ships in 1-3 Business DaysProduct Specifications- Other Name: Cylinder Head
- Position: Passenger Side
- Part Code: 22100R
- Item Weight: 35.00 Pounds
- Condition: New
- Fitment Type: Direct Replacement
- SKU: 22100-3E052
- Warranty: This genuine part is guaranteed by Hyundai's factory warranty.
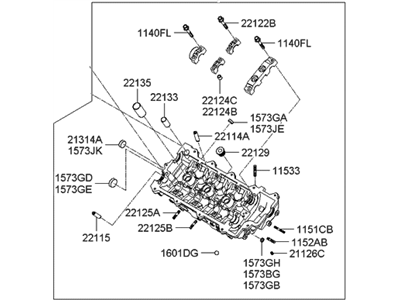

2008 Hyundai Santa Fe Head Assembly-Cylinder,LH
Part Number: 22100-3E002$842.27 MSRP: $1204.34You Save: $362.07 (31%)Ships in 1-3 Business DaysProduct Specifications- Other Name: Cylinder Head
- Position: Driver Side
- Part Code: 22100L
- Item Weight: 34.60 Pounds
- Condition: New
- Fitment Type: Direct Replacement
- SKU: 22100-3E002
- Warranty: This genuine part is guaranteed by Hyundai's factory warranty.
 Product Specifications
- Other Name: Head Sub Assembly-Cylinder, LH
- Position: Driver Side
- Part Code: 22110L
- Condition: New
- Fitment Type: Direct Replacement
- SKU: 22110-3C100
- Warranty: This genuine part is guaranteed by Hyundai's factory warranty.
 Product Specifications
- Other Name: Head Assembly-Cylinder,RH
- Position: Passenger Side
- Part Code: 22100R
- Condition: New
- Fitment Type: Direct Replacement
- SKU: 22100-3E051
- Warranty: This genuine part is guaranteed by Hyundai's factory warranty.
 Product Specifications
- Other Name: Head Assembly-Cylinder,LH
- Position: Driver Side
- Part Code: 22100L
- Condition: New
- Fitment Type: Direct Replacement
- SKU: 22100-3E001
- Warranty: This genuine part is guaranteed by Hyundai's factory warranty.
2008 Hyundai Santa Fe Cylinder Head
At HyundaiPartsDeal.com, we boast a vast inventory of genuine 2008 Hyundai Santa Fe Cylinder Head at unbeatable prices online. Each OEM 2008 Hyundai Santa Fe Cylinder Head is backed by the manufacturer's warranty, giving you peace of mind with your purchase. Additionally, our services include a hassle-free return policy and expedited delivery. So, what's holding you back? Start your shopping journey with us today!
2008 Hyundai Santa Fe Cylinder Head Parts Questions & Experts Answers
- Q:How to remove, inspect, and insatall the cylinder head on V6 for 2008 Hyundai Santa Fe?Posted by Yuri M.A:Before trying to remove the cylinder head, one has to release the fuel system pressure and hold the end of the cable from the negative terminal of the battery. Lower the car and remove the plastic skirt around the engine area and seiously disconnect the engine-cooling system radiator hose and turn off the water circulation pump. Then unbolt the upper and lower intake manifolds, and then exhaust manifold(s); the latter can be left temporarily bolted to the cylinder heads if wanted. Pull out spark plugs and spark plug wires and detach all other sensors and hoses producing a limitation to the spark plug removal process. On 2.7L and 2007 and earlier 3.5L engines, the timing belt must be removed; for 3.3L and 2010 and later 3.5L engines the timing chains should be removed. Continue with the camshafts' extraction, and then slacken the cylinder head bolts by 1/4 turn at a time until they can be fully unbolted, together with their accompanying metal liners, in the reverse of the installation pattern recommended earlier. Remove the cylinder head off the engine block by gently raising it, one side at a time with the aid of a wood block and a hammer but ensure the gasket surfaces are not marred in the process. Place the cylinder head on some woods to avoid scratching and if in doubt, do the same with another head. For measurement, place a scale on the head top and bottom to compare the thickness of both surfaces, making sure that no portion of the gasket is larger than the maximum allowance determined at the beginning of the inspection, combined with scrutinizing for cracks and coolant leakage at the valve seats. Before assembly of both the head and the block, make sure the areas where the two will be mating are clean and make use of gasket scraper and brake system cleaner to remove the carbon and old gasket. To prevent material from getting into the cylinders, the cylinders must be packed with clean shop rags besides using a vacuum cleaner to suck any material trapped in the cylinders. Inspect the block and head mating surfaces for nicks and scratches and remove the rough metal with an file but in a case where the damage is bad you may need to machine it. Thread the boltholes in the cylinder head with a tap, and blow the debris out with compressed air. In case of 2.7L and 3.5 L (2007 and earlier) engines, fit each bolt in a vise and running die on threads to remove corrosion or to restore them, whereas all the head bolts on 3.3L V6 engines are best replaced with the new one. Place the new gaskets over the dowel pins in the block with the identification mark going upward but it is worthy to place a drop of RTV sealant to each end of each of the gasket legs. For 3.3L and 3.5L (2010 and later) V6 engines, the last step is to 'paint' the head gasket end with 3 mm RTV sealant on the engine block before the gaskets are inserted. Place the head gently on the block but do not touch the gasket, and put clean engine oil on the thread and upside of the bolt head Delete and insert the bolts and turn them by hand tightly according to the torque sequence. The rest of the installation is performed in the reverse of the removal process, to which should be added the refilling of the cooling system, changing of the oil and filter, running of the engine and inspection for any signs of leakage.Answered by Hyundai Parts Specialist Enrique / Jul 01, 2024
Related 2008 Hyundai Santa Fe Parts
 2008 Hyundai Santa Fe Cylinder Head Bolts
 2008 Hyundai Santa Fe Cylinder Head Gasket
 2008 Hyundai Santa Fe Spool Valve
 2008 Hyundai Santa Fe Camshaft
 2008 Hyundai Santa Fe Timing Cover
 2008 Hyundai Santa Fe Exhaust Valve
 2008 Hyundai Santa Fe Intake Valve