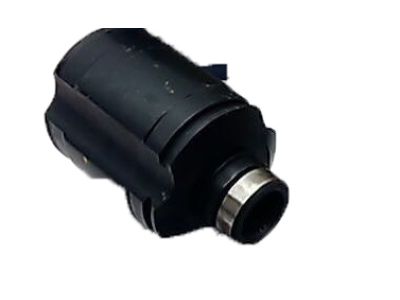
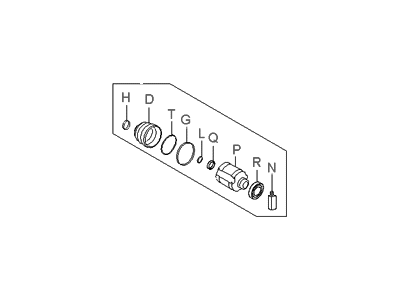
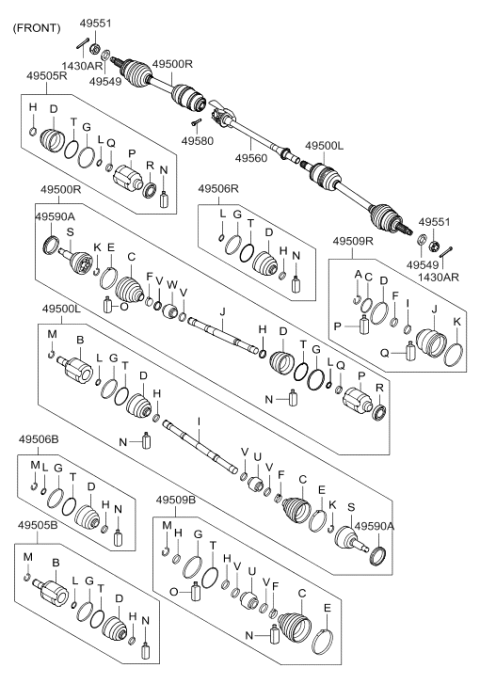
If the CV joint boots must be replaced, one should prepare all the options before beginning this job, as rebuilt drive axles can be ordered for exchange that will help to save time and efforts. This allows you to check whether an assembly has spare parts and the cost of the parts before effecting the disassembly. A number of auto parts stores sell split type replacement boots that do not require the driveaxle to be pulled out, this is good because if you want to clean the CV joint as indicated, it is easier and safer to do so when the driveaxle is out of the vehicle. Outboard CV joints should not be dismantled since all outer CV joint are Birfield while the inner ones are of varying designs. Starting off, the first and obvious step should be the removal of the driveaxle and subsequent clamping of the immobilized part on the vise equipped with wooden jaws to prevent any undesired harm to the object of investigation. With your hand, check the CV joint for any undue looseness and suitable Cl-Wheel motion; if a boot is sabalous, remove, scrub and assess for harm. Then it is necessary to take off the clamps and gradually push off the outer boot and remove the housing from the joint, indicating the position of the tripod and the axleshaft to assemble them again. This, ensure you pull out the tripod joint snap-ring then knock the tripod joint off the driveaxle using a brass punch and hammer without marring the bearing areas. All components must to be clean with solvent, check external and internal damages, signs of great wear. Thus, if the inner CV joint has to be replaced then a new one can be fixed on to the old axleshaft; however, if outer CV joint requirement change then there is a need to buy an outer CV joint along with the axleshaft. To reassemble there is need to cover the splines on the inner end of the axleshaft with tape and then place the clamps and boot on the axleshaft can be followed by the tripod or double offset joint. Coat all these parts with grease, and screw the tripod into the housing, and then pack grease around the threaded part. Check that boot is correctly positioned, correct the CV Joint Boot length, balance the pressure inside the boot, and finally tighten the clamps. Last but not the least; fit the driveaxle assembly.