My Garage
Cart
Make sure this part fits

Hyundai 23041-2E200 Piston & Pin & Snap Ring Assembly

2011-2020 Hyundai 230412E200

Customer Questions & Expert Answers (3)
23041-2E200 Hyundai Piston & Pin & Snap Ring Assembly Product Photo 1 of 4
  • Part Description
    Piston & Pin & Snap Ring Assembly
  • Part Code
    23410G
  • Manufacturer
    Hyundai
Make sure this part fits
$33.51 MSRP: $46.68
You Save: $13.17 (29%)
Ships in 1-3 Business Days
1
ADD TO CART
  • Related Parts
  • Product Specifications
  • Vehicle Fitment
  • Customer Questions & Expert Answers
  • Product Specifications

    BrandGenuine Hyundai
    Part Code23410G
    Manufacturer Part Number23041-2E200
    Part DescriptionPiston & Pin & Snap Ring Assembly
    Other NamesPiston
    Manufacturer NoteSTD-A(BLUE)
    Item Weight1.70 Pounds
    ConditionNew
    Fitment TypeDirect Replacement
    Require Quantity4
    ManufacturerHyundai
    SKU23041-2E200
    WarrantyThis genuine Hyundai part is guaranteed by Hyundai's factory warranty.
    Shipping & ReturnShipping Policy Return Policy
    Warning: California's Proposition 65
  • Vehicle Fitment

    Year Make Model Trim & Engine Important vehicle option details
    2011-2015 Hyundai ElantraDOHC - GDICoupe - 2Door 5P, Sedan - 4Door 5P
    2013-2020 Hyundai Elantra GTDOHC - GDISedan - 5Door 5P
    2014-2018 Hyundai TucsonDOHC - GDIWagon - 5Door 5P
  • Customer Questions & Expert Answers

    Q:
    Before I order I would like to verify if this part will fit my vehicle Posted by HyundaiPartsDeal Specialist
    A:
    You can Select Your Vehicle to check if 23041-2E200 fits your vehicle.
    Posted by HyundaiPartsDeal Specialist
    Q:
    How to remove the piston and connecting rod assemblies from Hyundai Elantra? Posted by Customer
    A:
    Prior to removing the piston and connecting rod assemblies, the cylinder head, oil pan, oil pump drive chain, oil pump, and baffle must be taken off. Use your fingernail to check for any ridge at the upper limit of ring travel, approximately 1/4-inch down from the top of each cylinder. If ridges are present due to carbon deposits or cylinder wear, they must be completely removed with a special tool, following the manufacturer's instructions, as failure to do so may result in piston breakage. After removing the ridges, turn the engine upside-down with the crankshaft facing up. Before removing the connecting rods, check the endplay with feeler gauges by sliding them between the first connecting rod and the crankshaft throw until the play is eliminated; the endplay should not exceed the service limit, or new connecting rods may be necessary. Check the connecting rods and caps for identification marks, and if they are not marked, use a small center-punch to create indentations. For specific engine models, it may be necessary to remove the ladder frame or lower crankcase to access all connecting rod bolts. Loosen each connecting rod cap nut gradually until they can be removed by hand, then take off the number one connecting rod cap and bearing insert without dropping the insert. To protect the crankshaft journal and cylinder wall during piston removal, slip a short length of plastic or rubber hose over each connecting rod cap bolt. Remove the bearing insert and push the connecting rod/piston assembly out through the top of the engine, using a wooden or plastic hammer handle to apply pressure on the upper bearing surface. If resistance is encountered, ensure all ridge material has been removed from the cylinder. Repeat this process for the remaining cylinders. After removal, reassemble the connecting rod caps and bearing inserts in their respective rods and install the cap nuts finger tight to prevent accidental damage to the bearing surfaces. Do not separate the pistons from the connecting rods.
    Posted by HyundaiPartsDeal Specialist
    Q:
    How to piston insatall and rod bearing oil clearance check on Hyundai Elantra? Posted by Customer
    A:
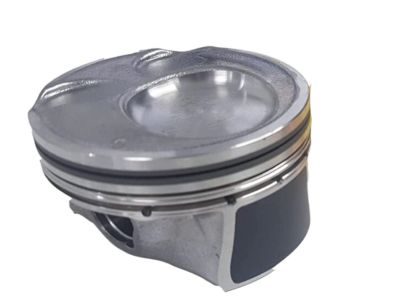
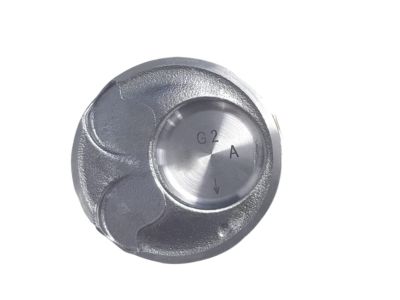
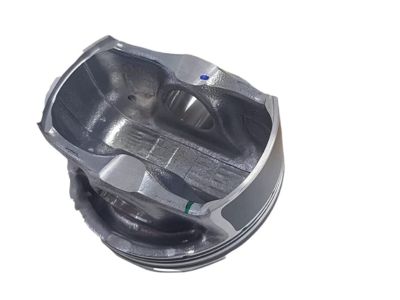
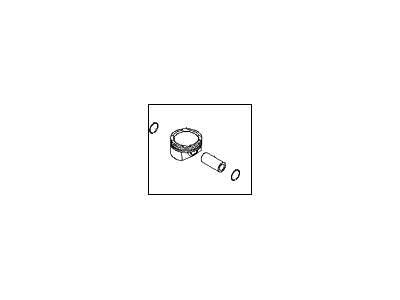
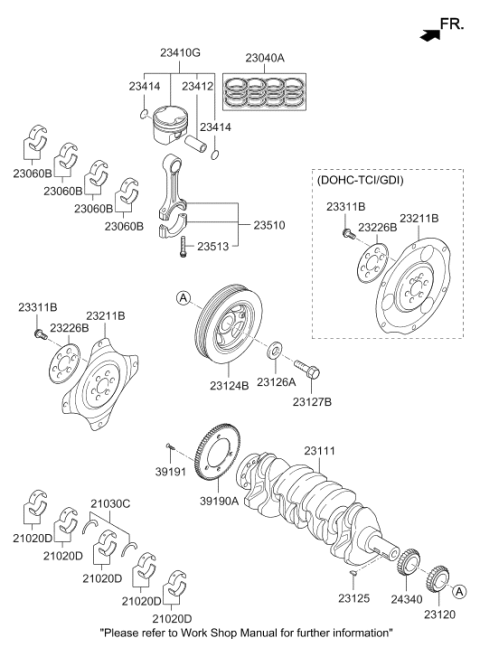
    On 1.4L and 1.6L engines, the pistons must be installed before the ladder frame. Before installing the piston/connecting rod assemblies, ensure the cylinder walls are clean, the top edge of each cylinder is chamfered, and the crankshaft is in place. Remove the cap from the number one connecting rod, taking care to check the marks made during removal, and wipe the bearing surfaces of the connecting rod and cap with a clean, lint-free cloth. Clean the back side of the new upper bearing insert and lay it in place in the connecting rod, ensuring the tab fits into the recess without hammering it. Clean the back side of the other bearing insert and install it in the rod cap, again ensuring the tab fits into the recess without applying lubricant. Stagger the piston ring gaps around the piston, then slip a section of plastic or rubber hose over each connecting rod cap bolt. Lubricate the piston and rings with clean engine oil, attach a piston ring compressor, and leave the skirt protruding about 1/4-inch to guide the piston into the cylinder. Rotate the crankshaft until the number one connecting rod journal is at bottom dead center and apply engine oil to the cylinder walls. With the mark on top of the piston facing the front of the engine, gently insert the piston/connecting rod assembly into the number one cylinder bore, resting the bottom edge of the ring compressor on the engine block. Tap the top edge of the ring compressor to ensure contact with the block, then gently tap on the top of the piston with a wooden or plastic hammer handle while guiding the connecting rod into place on the crankshaft journal. If resistance is felt, stop immediately to identify the issue. Once installed, check the connecting rod bearing oil clearance before permanently bolting the rod cap in place. Cut a piece of Plastigage slightly shorter than the width of the connecting rod bearing and lay it on the number one connecting rod journal. Clean the connecting rod cap bearing face, remove the protective hoses, and install the rod cap, ensuring the mating marks align. Tighten the nuts in three steps, using a thin-wall socket to avoid erroneous torque readings. Remove the nuts and detach the rod cap carefully to avoid disturbing the Plastigage, then compare the width of the crushed Plastigage to the scale on the envelope to obtain the oil clearance. If the clearance is not as specified, check for dirt or oil between the bearing inserts and the connecting rod or cap, and recheck the journal diameter. Carefully scrape all traces of Plastigage off the rod journal and bearing face without scratching the bearing. Apply a uniform layer of clean moly-base grease or engine assembly lube to both bearing faces, push the piston into the cylinder to expose the bearing insert face, and slide the connecting rod back into place on the journal. Remove the protective hoses, install the rod cap, and tighten the nuts to the torque in three steps. Repeat the procedure for the remaining pistons/connecting rods, ensuring the back sides of the bearing inserts and the insides of the connecting rods and caps are clean, the correct piston/rod assembly is used for each cylinder, the arrow on the piston faces the front of the engine, and the cylinder walls and bearing faces are lubricated. After all assemblies are installed, rotate the crankshaft by hand to check for binding, and finally, check the connecting rod endplay, comparing the measured endplay to ensure it is correct. If new rods or a new crankshaft were installed, inadequate endplay may require resizing at an automotive machine shop.
    Posted by HyundaiPartsDeal Specialist
    If you have any questions about this product, please don't hesitate to ask us. We will be happy to help you!

Genuine Hyundai Part 23041-2E200, your Right Choice

Select the OEM Part #23041-2E200 Piston & Pin & Snap Ring Assembly. It can be referred to as Piston. This part is compatible with 2011-2015 Elantra, 2013-2020 Elantra GT, 2014-2018 Tucson. Premium OEM quality parts improve performance and extend the life of your vehicle. They undergo strict quality checks and are built to Hyundai's factory specifications for proper installation.

HyundaiPartsDeal.com is a top provider of genuine Hyundai components and accessories. Looking for budget-friendly Hyundai OEM parts? Your search ends here with our wide range of genuine Hyundai products. Our economically priced parts come with the manufacturer's warranty to make sure you get your money's worth. Experience a smooth shopping journey with our fast delivery and easy return policy.

Why choose Hyundai Parts Deal

  • Dedicated Service

    Your complete satisfaction is our #1 goal

  • Lowest Prices

    Best deals on genuine OE parts from dealerships

  • Fast Delivery

    Orders are processed and delivered promptly