×
- Hello
- Login or Register
- Quick Links
- Live Chat
- Track Order
- Parts Availability
- RMA
- Help Center
- Contact Us
- Shop for
- Hyundai Parts
- Hyundai Accessories


My Garage
My Account
Cart
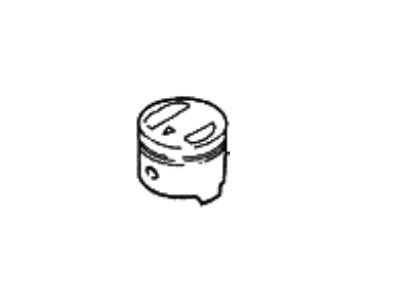
Genuine Hyundai Excel Piston
Engine Pistons- Select Vehicle by Model
- Select Vehicle by VIN
Select Vehicle by Model
orMake
Model
Year
Select Vehicle by VIN
For the most accurate results, select vehicle by your VIN (Vehicle Identification Number).
13 Pistons found
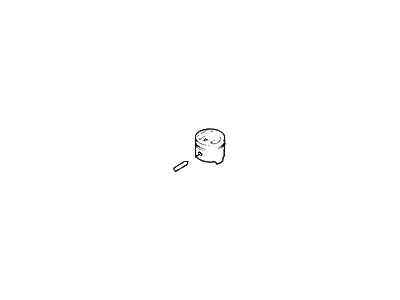
Hyundai Excel Piston & Pin Assembly
Part Number: 23410-21912$40.29 MSRP: $56.11You Save: $15.82 (29%)Ships in 1-3 Business DaysHyundai Excel Piston & Pin Assembly
Part Number: 23410-21110$40.29 MSRP: $56.11You Save: $15.82 (29%)Ships in 1-3 Business DaysHyundai Excel Piston & Pin Assembly
Part Number: 23410-21114$40.29 MSRP: $56.11You Save: $15.82 (29%)Ships in 1-3 Business DaysHyundai Excel Piston & Pin Assembly
Part Number: 23410-21911$40.29 MSRP: $56.11You Save: $15.82 (29%)Ships in 1-3 Business DaysHyundai Excel Piston & Pin Assembly
Part Number: 23410-21915$40.29 MSRP: $56.11You Save: $15.82 (29%)Ships in 1-3 Business DaysHyundai Excel Piston & Pin Assembly
Part Number: 23410-21916$40.29 MSRP: $56.11You Save: $15.82 (29%)Ships in 1-3 Business DaysHyundai Excel Piston & Pin Assembly
Part Number: 23410-21913$41.72 MSRP: $58.11You Save: $16.39 (29%)Ships in 1-3 Business DaysHyundai Excel Piston & Pin Assembly
Part Number: 23410-21914$41.72 MSRP: $58.11You Save: $16.39 (29%)Ships in 1-3 Business DaysHyundai Excel Piston & Pin Assembly
Part Number: 23410-21917$41.72 MSRP: $58.11You Save: $16.39 (29%)Ships in 1-3 Business DaysHyundai Excel Piston & Pin Assembly
Part Number: 23410-21918$41.72 MSRP: $58.11You Save: $16.39 (29%)Ships in 1-3 Business DaysHyundai Excel Piston & Pin Assembly
Part Number: 23410-24110$45.59 MSRP: $63.50You Save: $17.91 (29%)Ships in 1-3 Business DaysHyundai Excel Piston & Pin Assembly
Part Number: 23410-24911$45.59 MSRP: $63.50You Save: $17.91 (29%)Ships in 1-3 Business DaysHyundai Excel Piston & Pin Assembly
Part Number: 23410-24912$45.59 MSRP: $63.50You Save: $17.91 (29%)Ships in 1-3 Business Days
Hyundai Excel Piston
If you are looking for affordable high-quality OEM Hyundai Excel Piston, then you have come to the prime place. Our website provides a large amount of genuine Hyundai Excel Piston at unbeatable prices. All our parts come backed with the manufacturer's warranty.
Hyundai Excel Piston Parts Questions & Experts Answers
- Q: How to remove and install Piston on Hyundai Excel?A:Before the removal of the piston and connecting rod assemblies, on the models up to 2011, the cylinder head and oil pan must be disassembled and for the Ladder frame models from 2012 onwards, the lower and upper oil pan must be removed. First, look for any ridge at the top end of ring travel in any of the cylinder, and this should be trimmed off by a ridge reamer if existent. Once these ridges are out of the way, flip the engine around so that the crank shaft is on top. Inspection and measurement of the connecting rod end play using the feeler gauges should be done; if on the measurements are bigger than the limit then new connecting rods maybe required. Identify the connecting rods and remove the cap nuts; you can then remove the cap along with the bearing insert-be careful not to drop the latter. Remove, or push out, the connecting rod with the piston assembly through the top of the respective cylinder using a wooden dowel; and continue to do so for all remaining cylinders. It they have been removed, re-thread the caps and inserts back to avoid further damage. Piston ring installation should be checked by end gap and piston ring side clearance for the piston rings. Arrange the assemblies and new ring sets, put the first top ring into the first cylinder while centering it to the cylinder walls. Set and check the end gap with feeler gauges when needed. The oil control ring goes on first, followed by the middle and the top rings-with the correct orientation being maintained. Before using the assemblies it is recommended that the edges be chamfered, and the cylinder walls be cleaned. New bearing inserts should be pressed in to the connecting rod and cap with out applying any lubricatant and keep both the surfaces clean. Ensure that you have correctly aligned the gaps of piston rings; apply some oil on the piston as well on the rings; for piston rings use the help of piston ring compensator. Place the piston/connecting rod assembly way into the cylinder with the arrow orientation facing the front of the engine. Using Plastigage, establish the amount of oil clearance in the connecting rod bearing and compare it with the standard measurements. If the clearance is improper, then cleanliness should be confirmed and the journal diameter should be measured before proceeding to use new bearing inserts. I always check and clean the bearing faces so that I apply grease/assembly lube then fit the connecting rod and screw the cap and fix the nuts in correct torque. Do the same for the other assemblies in order to maintain cleanliness and proper orientation in the given procedure. Last of all, turn the engine over with the Crankshaft to examine binding, and to measure or adjust the connecting rod endplay.


